Raspberry Pi Pico & ESP8266 WiFi Module
ESP8266 is little board that will allow us to connect our Raspberry Pico to a LAN network. Steps:
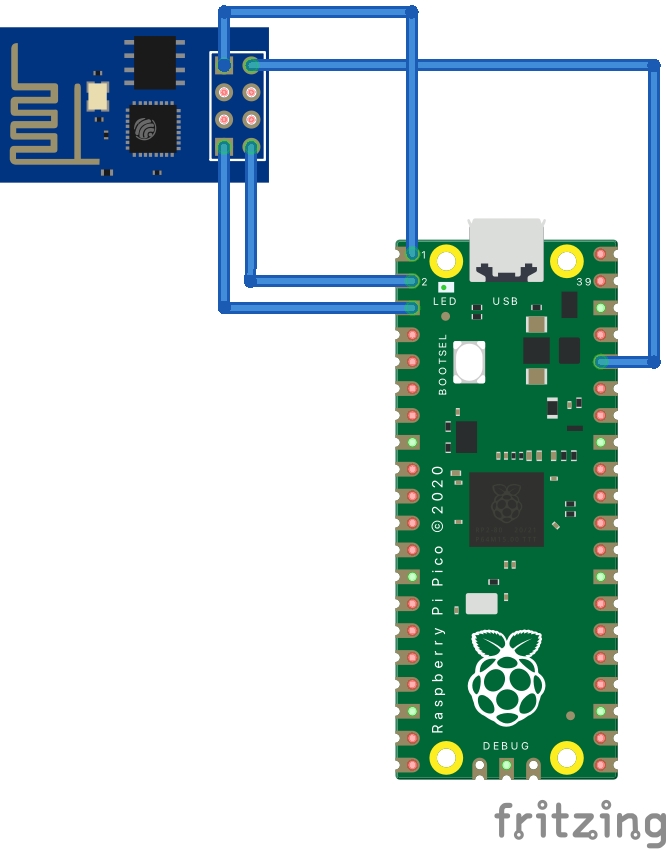
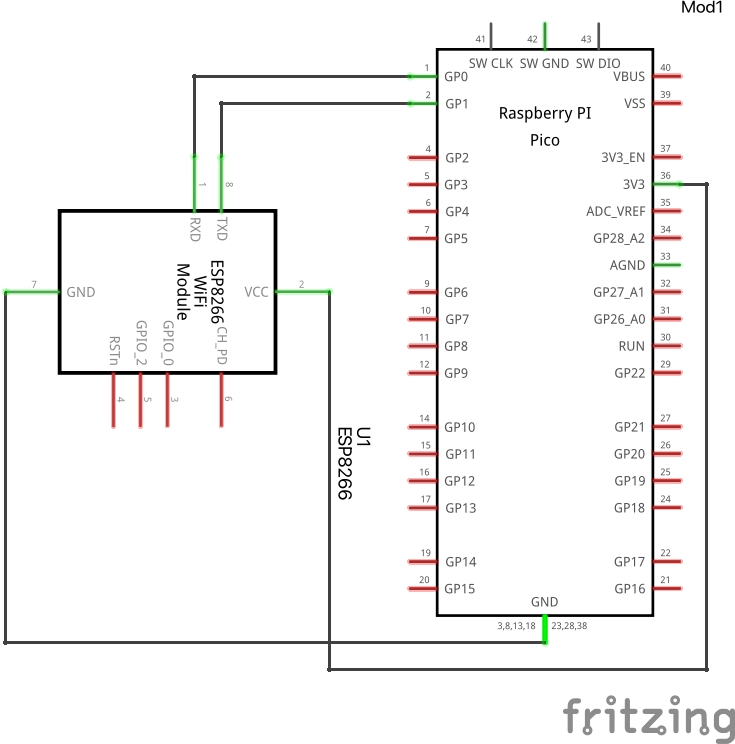
- First of all connect everything as the next connection instruction:
Connections:
| ESP8266 | 3V3 | GND | Rx | Tx |
|---|---|---|---|---|
| Raspberry PI Pico | 3V3 | GND | GP0 | GP1 |


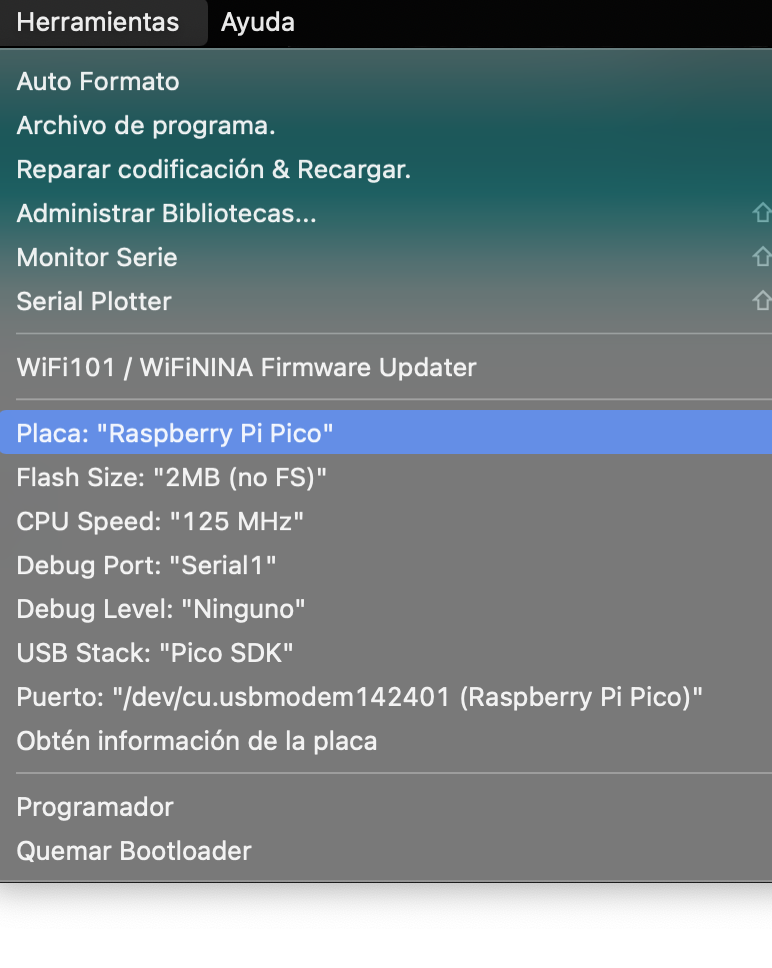
- Then, open Arduino IDE. (In this case we are going to use C and Arduino IDE to open a communication with the ESP8266 board). We are going to select Raspberry Pi Pico Board into the tools menu (to allow this board we have to download it previously from the board manager, where we can find the board if we have put into preferences>Urls the following link: https://github.com/earlephilhower/arduino-pico/releases/download/global/package_rp2040_index.json), and put the debug port into “Serial 1”.

- Copy and paste the following code into your Arduino Ide and click into Run or Upload.
void setup() {
  Serial.begin(9600);
  Serial1.begin(115200);
  delay(5000);
  Serial.println("Iniciando");
}

void loop() {
  // put your main code here, to run repeatedly:
  if(Serial.available()>0){
    char c=Serial.read();
    Serial1.print(c);
  }
  if(Serial1.available()>0){
    char c=Serial1.read();
    Serial.print(c);
  }
}
The output is the next one. Don’t be afraid if some words are in red, this is normal, these messages are informative messages.

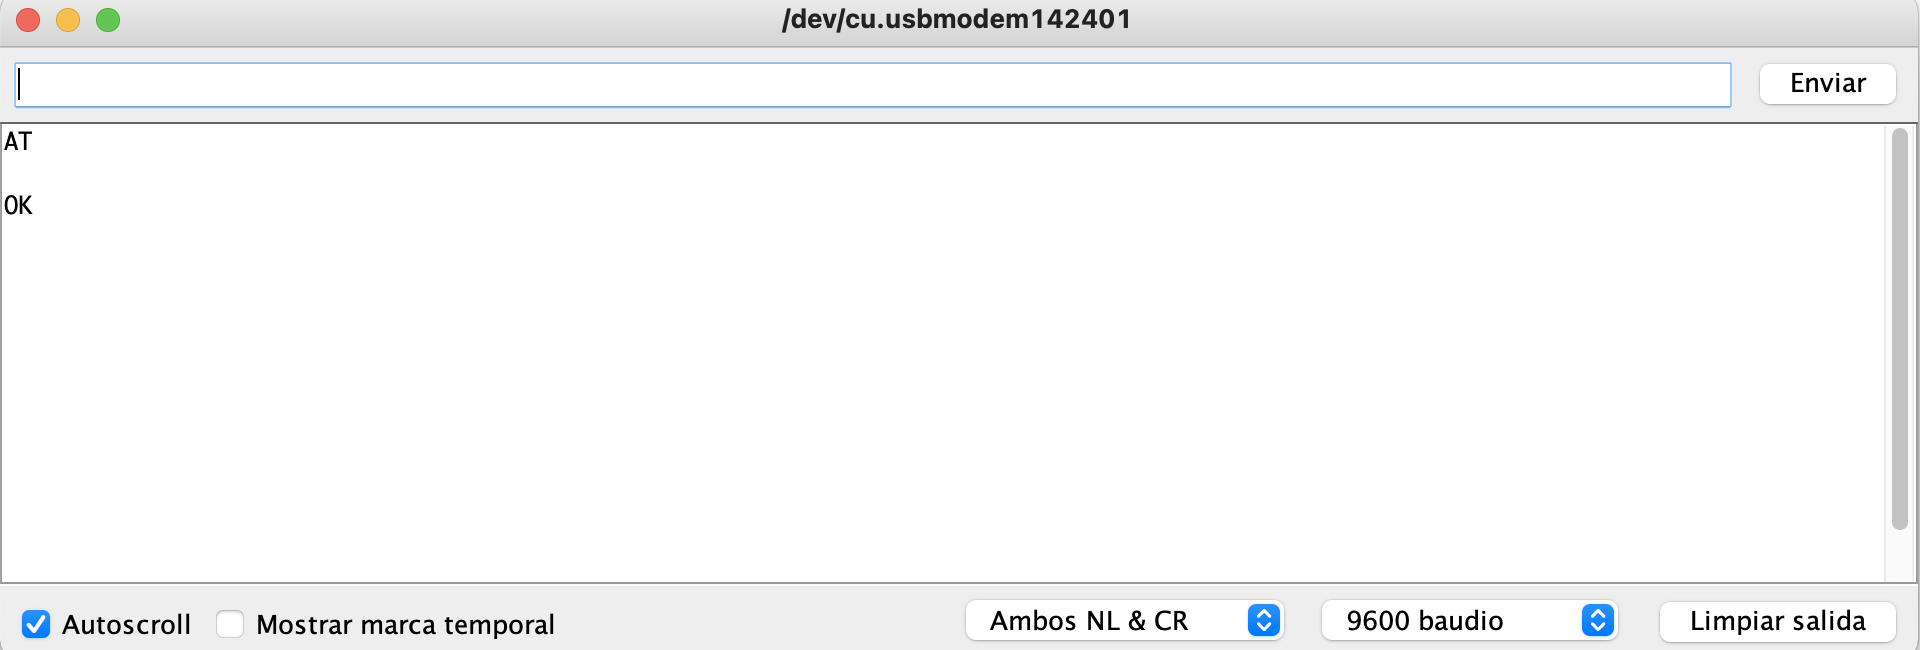
- Open the Serial Terminal, and set the parameters to “both NL & CR” and in 9600 baudios. After that write “AT”. If the following message is “OK” everything work correctly, otherwise, no response, Fail or characters unreadable means that somenthing haven’t been configured well.

